Hi everyone!
Today i would like to show you a minialbum i created for a sweet friend in the states. There is a lot of pics in this post, but i hope you will stick around anyway, lol.
These days coin-envelopes are hard to get a hold of here in Norway, so i have improvised a bit. My friend Martica, made me a mini-album recently and i copied her take on these envelopes. (Btw it`s absolutely gorgeous the mini i received.)
Hope you like the mini i created. Here we go.
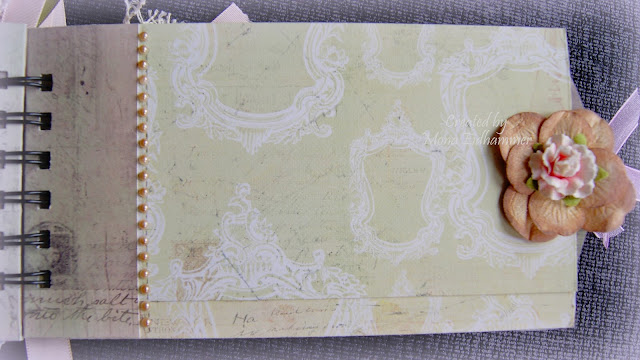
On the cover i have used Prima papers, Nature`s Garden collection while the papers are all from the Tea-Thyme collection.
You can see a chipboard piece from Dusty Attic on the front. This i have left plain, only used clear wink of stella on it to make it glittery. The effect is just gorgeous. You can see it at bit better on the image below. The flowers are from Prima, Petaloo, Kort og Godt and Storyteller.
I also used Wink of Stella on the wood piece from Kaisercraft. The white frame is created from paperclay using a mold.
This is the first time i have made use of my bind it all without help. And i think i got hang of it fairly quick. So i might just have to start creating more mini abums, lol. I can`t just let it stay on my shelf collecting dust either, hahaha.
For decoration, i created a charm using glass beads and an wing and also some metal decor. Love how it turned out.
Tags for pictures. I wanted to have as many possibillities for pics as possible.
Pages with flaps to have space for pics or journaling.
All the flaps has magnetic lock to keep them in place.
I wanted to keep the album fairly simple as the pages are so decorative themselves. Also i wanted to keep the space free to be able to place pics in a nice way. There is plenty of space to decorate after pics are placed.
I was originally making an other album but i managed to muck it up totally. The binding was completely wrong. And the pages looked weird. But i`m happy anyway, course i got to create this lovely piece instead. I had a hard time sending it to the States as i liked it so much myself. But i`m happy i did, course the lady who received it was overwhelmed by it. And i`m sooooo so happy she liked it.
Hope you like it as well. Thanks for stopping by. I really appreciate it.
Some of you might notice that i have changed settings on my blog. I have removed the Google + connection to make it easier to comment. I have noticed that i allmost never got any comments on my posts and here the other day a lady told me that i should remove Google + as not many were using it. That`s why my comment section has been rather slim. I was not completely aware of the fact but now i have changed it, so i hope i get more comments now. I`m a bit slow you see, hahaha.


