Showing posts with label Dusty Attic. Show all posts

Thursday, November 24, 2016

Vintage mixed media canvas

Hi everyone!

Is anyone starting to get in some Christmas mood? Well i`m not! So i`ll just have to work on it, lol. In the meanwhile i have worked on something else. I got commisioned a vintage canvas and that`s what i`m going to show you.


The size canvas is about 6x8"...ish.
I started with priming the canvas with gesso. Next i used some modelling paste and stencils to make some extra texture. I started gluing down my embellishments when the paste had dried. I used a chipboard frame from Blue fern studios and a leaf branch from Dusty attic.


The image is from Ppinkydolls and is coloured with ProMarkers.


I have used flowers from Prima mainly but also some few others. Several metal work pieces and some lace. It all were thoroughly covered with gesso before i sprayed the whole thing with several colours of sprays from Lindy`s Stamp Gang.


I finished it of with some gems and some liquid pearls.


Look at the gorgeous sparkle of the flower. It was coated in a generous layer of Stickles stardust. Looove how it turned out.


Hope you like my new project. Thanks for stopping by today!
I allways appreciate some love, hint, hint, wink, wink, lol.
See you soon.

I`m entering these challenges:

Nordsalten hobbyklubb - Anything goes
Kort o Mania - Anything goes

Wednesday, November 9, 2016

Altered wooden box

Hi there everyone!

Hope you are all having a great day. The winter has finally arrived here in Trondheim....brrrrr. It`s cold but it looks so much britghter and cleaner outside now. So much better than the pooring rain. But, it won`t stay for long. The first snow never does.

Today i want to show you a wooden box i altered as a present to my eldest daughter.
In the top of this box is a small canvas which i primed with white gesso and decoupaged the image onto. 


Next i adhered all my chosen embellishments and gessoed it all.


On the sides i used some different stencils and put on some texture paste blended with sand to get this rough look on them.


Before i glued the canvas to the box, i sprayed it several times with sprays from Lindy`s Stamp Gang. And i just love how it turned out. 


Just look at all this yummy gorgeous shimmer. Looove it!


That`s it for today. Thanks for visiting me and hope to see you soon back again.


Saturday, August 27, 2016

Coin envelope mini-album

Hi everyone!

Today i would like to show you a minialbum i created for a sweet friend in the states. There is a lot of pics in this post, but i hope you will stick around anyway, lol.

These days coin-envelopes are hard to get a hold of here in Norway, so i have improvised a bit. My friend Martica, made me a mini-album recently and i copied her take on these envelopes. (Btw it`s absolutely gorgeous the mini i received.)

Hope you like the mini i created. Here we go.


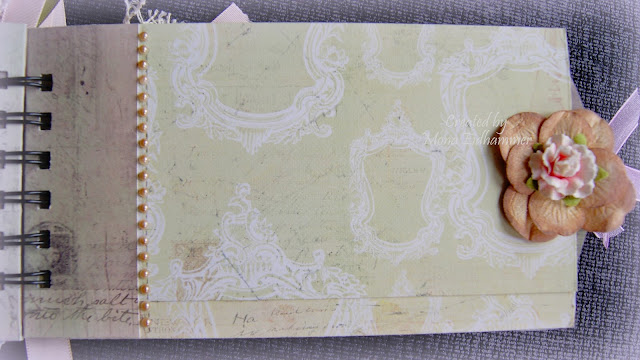
On the cover i have used Prima papers, Nature`s Garden collection while the papers are all from the Tea-Thyme collection. 


You can see a chipboard piece from Dusty Attic on the front. This i have left plain, only used clear wink of stella on it to make it glittery. The effect is just gorgeous. You can see it at bit better on the image below. The flowers are from Prima, Petaloo, Kort og Godt and Storyteller.


I also used Wink of Stella on the wood piece from Kaisercraft. The white frame is created from paperclay using a mold.


This is the first time i have made use of my bind it all without help. And i think i got hang of it fairly quick. So i might just have to start creating more mini abums, lol. I can`t just let it stay on my shelf collecting dust either, hahaha.


For decoration, i created a charm using glass beads and an wing and also some metal decor. Love how it turned out. 


Tags for pictures. I wanted to have as many possibillities for pics as possible.


Pages with flaps to have space for pics or journaling.


All the flaps has magnetic lock to keep them in place.


I wanted to keep the album fairly simple as the pages are so decorative themselves. Also i wanted to keep the space free to be able to place pics in a nice way. There is plenty of space to decorate after pics are placed.


I was originally making an other album but i managed to muck it up totally. The binding was completely wrong. And the pages looked weird. But i`m happy anyway, course i got to create this lovely piece instead. I had a hard time sending it to the States as i liked it so much myself. But i`m happy i did, course the lady who received it was overwhelmed by it. And i`m sooooo so happy she liked it.

Hope you like it as well. Thanks for stopping by. I really appreciate it.

Some of you might notice that i have changed settings on my blog. I have removed the Google + connection to make it easier to comment. I have noticed that i allmost never got any comments on my posts and here the other day a lady told me that i should remove Google + as not many were using it. That`s why my comment section has been rather slim. I was not completely aware of the fact but now i have changed it, so i hope i get more comments now. I`m a bit slow you see, hahaha.


Saturday, May 7, 2016

Vintage tag swap - The Vintage dressform tag

Hi there everyone!

A little while ago i participated in a vintage tag swap hosted by my friend Martica over in the states. She allways throws such fun and fabulous swaps. I`m not allways able to join in but this time i had some spare time to join. There is a lot of pics so i will post the three tags in separate posts.

First post up is the Vintage dressform tag. 


I used a large manila tag #10 and covered it with papers from Maja Design, Vintage Summer Basics.
The chipboard frame is embossed with white embossing and while still warm i sprinkled some pink micro beads onto it so it would adhere in the embossing enamel. I was really happy about how it turned out. This frame is a bigz dies from Sizzix.


I left the dressform-chippie plain as i thougt it was the right look for this tag.


 As i assembled the tag i used some digital tags i bought online from a company called "By Digital Paper". They have so much gorgeous shabby chic/vintage digital ephemera and stuff :-) You can see them behind the dressform stamped image. (The ones with the bird and the flowers.)


A little tip for you all. When you want to make some space between all your layers, it is great to use scraps of chipboard instead of the expensive foam tape. When i buy chipboard i allways save the scraps so i can use them behind images or other embellishments. So it`s a great way to create some dimension to your project. It also makes your project more sturdy. 

Thanks for taikng the time to visit. Hope you liked my first tag. Stay tuned and tomorrow i will show you the next tag i have created for this swap.


Wednesday, October 28, 2015

WSBT round 2 - Layout category

Hi there!

Just popping in to share with you my last creation for round 2 in the World Scrap Battle and Tournament. It`s a layout of my wedding and i just have to warn you that this is a picture-heavy post.


As our wedding theme were light blue i decided to use that colour for my layout. I love how the pics turned out and we had so much fun shooting them.


The paper is Parisian Anthology collection from Pink Paislee. Love the resist in the paper which you will see on a couple of pics further down. I started with Art Basics modelling paste from Prima using the burlap stencil by Tim Holtz and the moroccon lattice stencil from KaiserKraft. When dry, i used Broken china distress ink to frame the area of the photo. Next i spritzed with Blue Hawaiian blue from Lindy`Stamp Gang.


I then watered down some white and some black acrylic paint to make it thinner, and dripped it on the paper. I also dripped the blue from Lindy`s as well. The heart is Prima, Amore aqua coll. and the rose is WOC.


This Resin rose element from Prima was a bit ruined but i figured i could still use it. I painted the middle of the big flower (Meredith dove from Prima) to get rid of the "wrong" colour and gave the big rose (Arcadian coll. from Prima) some stickles diamond glitter. The memories element is also from Prima.


The Always and forever chipboard text is from Blue fern studios. I have painted it with some light blue acrylic paint and adhered it with some dimentional pillows. 


I and my amazing husband. 


Below are a couple of closeups, of the gorgeous shimmer from the sprays by Lindy`s. And you can also see the resist in the paper as i mentioned earlier. I just sprayed the mist and then used a damp cloth to dry it off, and the letters came forward as i never had sprayed them. Awesome, don`t you think?


I`m opleased with how this LO turned out. I still have lots to learn. But it is so much fun creating layouts. 


Hope you like this as much as i do. Thanks for visiting me today.

Related Posts with Thumbnails