Thursday, December 17, 2015

My first ATCs

Hi everyone! 

I`ve tried something i`ve never done before....ATCs. For those of you that don`t know what an ATC is. ATC stands for Artist Trading Card. These are sized 2 1/2 x 3 1/2 inch. They may seem small but this size is set because they are supposed to fit into the standard card collector pockets.

A little while ago i entered a small challenge on Facebook where we were given a recipe on how to go ahead creating these ATCs. I never thought i`d pull it off but i made it, lol. And i had so much fun as well. So this is something i want to try out more. Hope you like them.


I started off with 4 different heavy designpapers. I painted them with gesso blended in water to get at more transparent look just to tone down the pattern of the paper. 


Next i took some silk paper and stamped it randomly with several stamps. I then crinkled it up and glued it onto the paper sheets. 


For the last steps i first put on some tissue tape and then stamped it with a background stamp. Last step before embellishing was spritzing them with sprays from Lindy`s stamp gang. 


Finally the cards were ready to get embellished. I cut out some vintage images from a cuttingsheet from Kort & Godt and put on some text stickers from Authentique. And some other small embellies.


I actually like how they turned out. So i`m definately going to try this again soon. I`m sorry i didn`t get to catch the shimmer of the colours. Daylight here is quite poor on this time of year. But i can asure you the shimmer looks fabulous! 

Thanks for taking the time to visit me. Allways love visits.


Sunday, November 8, 2015

Father`s day

Hi everyone!

Today we are celebrating father`s day here in Norway, and in that regard my hubby asked me if i could create a card for him to give to his father. Of course i couldn`t say no to my sweet guy, så here it is.


I think this must be the fastest card i have ever made, but i really am satisfied with how it turned out. My hubby needed a card with a pocket to put a lotteryticket into, so this is what i created. I have seen these types of cards online before and found out it was a perfect card to use. I had to use my own measurements though, as the ticket didn`t have the same size as a giftcard. But the principle is the same. The tutorial i found here.


To decorate the card i used a piece of watercolour paper and used distress ink with a blendingtool and spritzing water to make it blend. Then i used spray inks with perfect pearls, which i have blended myself to get the shimmery parts. Finally i distressed the edges and inked them up.
The butterfly i got in a prize pack i received so i`m not sure what company it`s from but it might be Prima. The rub-on is from Staz.

Hope the explanation was understandable. I`m not the best tutor, lol.
Anyway....thanks for visiting me today!

Challenges entered:

TreL - Farsdag
Whimsy stamps Challenge - Fall colours or Christmas
Left of Centre Creative Challenges - Things with wings

Wednesday, October 28, 2015

WSBT round 2 - Layout category

Hi there!

Just popping in to share with you my last creation for round 2 in the World Scrap Battle and Tournament. It`s a layout of my wedding and i just have to warn you that this is a picture-heavy post.


As our wedding theme were light blue i decided to use that colour for my layout. I love how the pics turned out and we had so much fun shooting them.


The paper is Parisian Anthology collection from Pink Paislee. Love the resist in the paper which you will see on a couple of pics further down. I started with Art Basics modelling paste from Prima using the burlap stencil by Tim Holtz and the moroccon lattice stencil from KaiserKraft. When dry, i used Broken china distress ink to frame the area of the photo. Next i spritzed with Blue Hawaiian blue from Lindy`Stamp Gang.


I then watered down some white and some black acrylic paint to make it thinner, and dripped it on the paper. I also dripped the blue from Lindy`s as well. The heart is Prima, Amore aqua coll. and the rose is WOC.


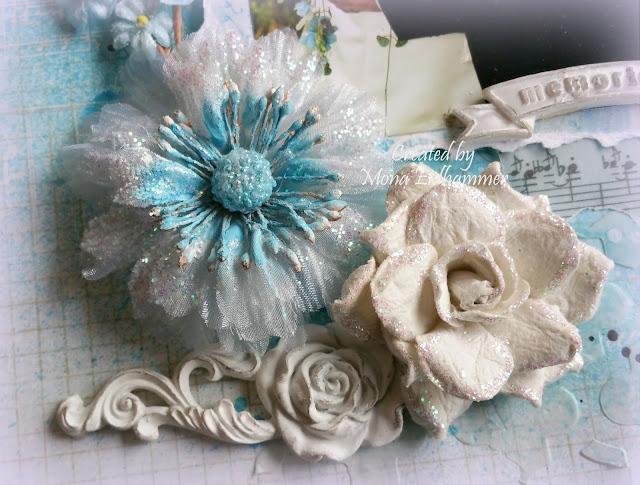
This Resin rose element from Prima was a bit ruined but i figured i could still use it. I painted the middle of the big flower (Meredith dove from Prima) to get rid of the "wrong" colour and gave the big rose (Arcadian coll. from Prima) some stickles diamond glitter. The memories element is also from Prima.


The Always and forever chipboard text is from Blue fern studios. I have painted it with some light blue acrylic paint and adhered it with some dimentional pillows. 


I and my amazing husband. 


Below are a couple of closeups, of the gorgeous shimmer from the sprays by Lindy`s. And you can also see the resist in the paper as i mentioned earlier. I just sprayed the mist and then used a damp cloth to dry it off, and the letters came forward as i never had sprayed them. Awesome, don`t you think?


I`m opleased with how this LO turned out. I still have lots to learn. But it is so much fun creating layouts. 


Hope you like this as much as i do. Thanks for visiting me today.

Sunday, October 25, 2015

WSBT - Round 2

Hey everyone!

Ok i know....i`m late posting this. I have no other excuse than i totally forgot. Sooorrrryyyy :-) But at least you`ll get 2 creations for the price of 1, lol.

So here i am with my next creations for the World Scrap Battle and Tournament round 2. And first up is my card.


I`ve created a vintage card in white for a communion. I`m not sure but i think the image i used is from a cuttingsheet from Kort & Godt. Please don`t arrest me if i`m wrong, lol.


I`ve used several kinds of flowers. They are from Kort & Godt and Wild Orchid Crafts.


Next up is my mask for the Alter category.


This is what it looked like before i started.


And here is the end result. I just loooove how it turned out. 


This is actually a candlelight decoration i have had for ages. I found it at Nille a few years ago, thinking it was so beautiful. I didn`t have the slightest idea of what i was gonna use it for though, lol. It was just one of those things you just HAVE to have. But this project is absolutely what it was ment for. I totally see it now, lol. 


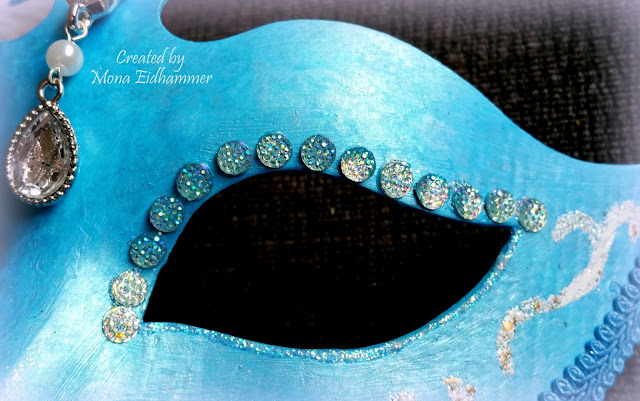
I love how the blue shimmery look turned out. It is a blend of pearlescent sky blue ink from Tsukineko and Blue Hawaian blue starburst from Lindy`s Stamp gang. Topped with gems from Marianne Design over the eyes.


The chipboard piece from Dusty Attic is covered with shabby blue embossing enamel from Stampendous and the flowers are from Prima, WOC and Papirloftet. I believe the gems are also from WOC. The feathers are from Nille as well.

If you have any questions as to how the process was, i`ll be happy to answer.

Thanks for visiting me.

Thursday, October 22, 2015

World Scrap Battle and Tournament round 2

Hey everyone!

I`m so excited and happy to say that i got through to round 3 with all my creations. And the next 4 days i will show you what i created for round #2. Starting with my mixed media canvas. The theme set for this round was Monochromatic.


I started priming the canvas with gesso and glued the two heart shapes onto it. Next i glued plastic to cover the whole thing. You can stretch the plastic any way you like to create the texture you want. When i was satisfied with the way it was, i painted it with acrylic paint, making sure to get shades into it as well. I also put on some fine sand to get an extra texture. To finish it off i used my finger to just gently rub on some silver paint to make the texture pop a bit more.  


Hope you like my little canvas. Please feel free to stop by tomorrow as i`m having a new creation ready for you. 

Thanks for visiting me. Have a nice day everyone.


Saturday, October 10, 2015

Final entry in round 1 of the World Scrap Battle and Tournament - Mixed Media

Hi there!

This last entry in round 1 is a small ring binder from BoBunny of which i have altered the front cover. But before i start i just want to warn you that this is a picture heavy post :-) 

I liked the look of the spine, so i left it the way it was. I started gluing on the mesh tape and used modelling paste from Prima with stencils from Prima and The Crafters Workshop. Next i adhered the chipboard pieces. The leaf chippie is from Joanna Sheen and the big one on the left, is Blue Fern Studio.


Next i adhered all the metal pieces. The dragonflie in the right upper corner, the cogwheels in the middle of the page and the clockpiece with the bee on top. and some other small pieces.


Next i gessoed the whole thing with white gesso. 


I then sprayed the cover with sprays from Lindy`s Stamp Gang and from Shimmerz Paints. I also used some H2O for the red spots. To make the stenciled patterns pop a bit more i used my finger to lightly rub some gesso on top of some pieces.


I just love the shimmery look of this. Sadly the pics doesn`t do it justice. 


To finish it off i added some small bling crystals, here and there, and paper letters to complete the words. I couldn`t find small letters in the right size though, so i had to use my Dymo and make some myself.

Well that`s it. Round 2 is allready in progress and next sunday i will be ready with more creations from the World Scrap Battle and Tournament.

Have a great weekend everyone!


Friday, October 9, 2015

World Scrap Battle - Layout

Hi there everyone!

Today i have for you the layout i created for the World Scrap Battle and Tournament.
I`m fairly new to making layouts and the theme was a problem for me, making this one. I found out i just should use the inspiration photo itself as a focal point on my layout. So here it is:


As i was going to use distress ink and stencil to make my own backround. I found that i had to use watercolour paper to make sure it could handle the saturation. The only thing i didn`t like is that it became too bulky and no matter how much glue i used to adhere it to the cardstock, it didn`t get less bulky. Either way i had a lot of fun trying out some techniques that are new to me. I actually like how it turned out all though there were a lot of greater entries by others in the battle.


The pic i adhered with 3d coushins so make it stand a bit more out from the paper. The stencil i have used is the checkerboard stencil from Prima Finnabair collection. Which i used together with the Modelling paste, also Prima. To get the yellow colour i added a couple of small pinches of Golden sleighbells magicals from Lindy`s Stamp Gang. 


The sentiment is chipboard sticker from my own stash. I don`t remember the company i`m sorry to say.


This star is a star-tag which i embossed with all white embossing powder and then added som black glitter embossing to it. I coudn`t catch the glittery stuff but i like how it turned out.


All the other papers and embellies are from a class i took by Irit Landgraf earlier this year. These have been sponsored by Hip Kit Club if my senile brain aren`t too far off, lol. I think it`s fabulous no matter what.

That`s it for today. Tomorrow i`ll be back with my last creation for round 1 and it is in the Mixed Media category. This one i`m fairly satisfied with, so i have saved it for last.

Thanks again for visiting me and hope you have enjoyed your stay!


Thursday, October 8, 2015

World Scrap Battle - Card

Hi there everyone!

I`m ready with my second entry in the World Scrap Battle and Tournament. Today i will show you my entry in the Card category. The inspiration provided is the same for all the entries in round 1.

I have used some form of mixed media on all of my creations and for this card i have i have had some fun with the new stamp and dies set from Tim Holtz, Crazy birds. I think these are so much fun and totally adorable as well.


This stamp is coloured with distress ink. Mustard seed and Broken china. For the beek, i have used H2O Natural linen as i didn`t have distress ink in orange. I have never coloured with distress ink before and i think i have a bit of a learning curve ahead of me, lol.


For my background i used modelling paste from Prima`s Finnabair collection togheter with the Tim Holtz flourish stencil. After dry i spritzed with Carribean blue Flat fabio from Lindy`s Stamp Gang. Next i spritzed with Twinkling tinsel also Lindy`s, to get the shimmery effect. Least i blended some white gesso with water an put on some drips here and there. To finish off my card i stamped a sentiment from Visible Image with white acrylic paint on some black cardstock. I think their range of stamps are perfect for mixed media.


Tomorrow i will be back with my third creation for this battle tournament. I will show you my layout. Meanwhile, have a great day. Thanks for visiting me.


Related Posts with Thumbnails