Showing posts with label Charms. Show all posts

Saturday, October 8, 2016

Kurs med Randi Thorsen

Good morning peeps!

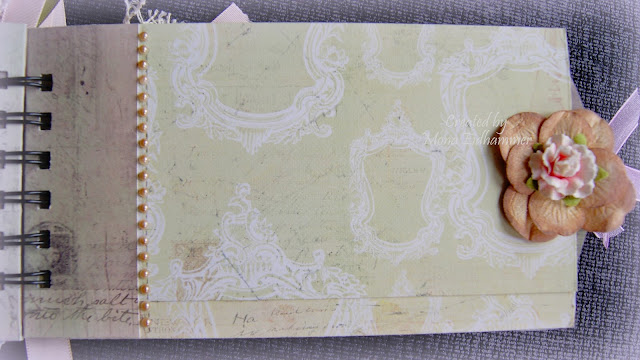
I`m back here to show you a box i made lat year. Yeah i know....way overdue, lol. I was attending a class held by Randi Thorsen, a well known crafter in the Norwegian crafting community. Looove her stuff. And i`m so pleased i got to meet her.


You might recognize her style in my box. I think it turned out quite well. 


I just love how much the pearlstrings makes the whole box. It would definately not have been the same without it.


All flowers are from I am Roses.

Thanks for the visit. See you soon.


Monday, September 26, 2016

Shabby chic candy jar

Hi there everyone!

Today i want to show you a candy jar i have altered. My oldest daughter came to me wondering if i could help her make a birthday present for her best friend. And i just couldn`t say no. She has never asked me to create something for her, so the pressure to make something extraordinary layed heavy on my shoulders, lol. But i was very proud to be asked. So i just had to get started.

She had this empty candy jar she wanted med to turn into something nice. I`m sorry byt i forgot to take pics before i started but i have LOTS of pics of the end result, lol. So i just have to warn you that this is a picture heavy post. 


A while back i purchased some vintage ephemera print outs on Etsy from a company called By Digital Paper. She has a lot of gorgeous ephemera. And for this jar i used the Sweet Angel bookmarks


 I decoupaged the paper to the jar and glued on the bling strips in between the sheets.


Aren`t these totally adorable? I just looove these images. 


On the top of the jar i cut out the centre of a doily to make place for the handle. I then adhered it to the top. 


Next i put on a lot of trims around the jar and the top. 


To finish it off i put on a lot of different flowers, a resin element and a charm.


As a last touch i gave the flowers a little touch with some glitter glue.


Thanks for visiting me today. Hope to see you back here soon.


Saturday, August 27, 2016

Coin envelope mini-album

Hi everyone!

Today i would like to show you a minialbum i created for a sweet friend in the states. There is a lot of pics in this post, but i hope you will stick around anyway, lol.

These days coin-envelopes are hard to get a hold of here in Norway, so i have improvised a bit. My friend Martica, made me a mini-album recently and i copied her take on these envelopes. (Btw it`s absolutely gorgeous the mini i received.)

Hope you like the mini i created. Here we go.


On the cover i have used Prima papers, Nature`s Garden collection while the papers are all from the Tea-Thyme collection. 


You can see a chipboard piece from Dusty Attic on the front. This i have left plain, only used clear wink of stella on it to make it glittery. The effect is just gorgeous. You can see it at bit better on the image below. The flowers are from Prima, Petaloo, Kort og Godt and Storyteller.


I also used Wink of Stella on the wood piece from Kaisercraft. The white frame is created from paperclay using a mold.


This is the first time i have made use of my bind it all without help. And i think i got hang of it fairly quick. So i might just have to start creating more mini abums, lol. I can`t just let it stay on my shelf collecting dust either, hahaha.


For decoration, i created a charm using glass beads and an wing and also some metal decor. Love how it turned out. 


Tags for pictures. I wanted to have as many possibillities for pics as possible.


Pages with flaps to have space for pics or journaling.


All the flaps has magnetic lock to keep them in place.


I wanted to keep the album fairly simple as the pages are so decorative themselves. Also i wanted to keep the space free to be able to place pics in a nice way. There is plenty of space to decorate after pics are placed.


I was originally making an other album but i managed to muck it up totally. The binding was completely wrong. And the pages looked weird. But i`m happy anyway, course i got to create this lovely piece instead. I had a hard time sending it to the States as i liked it so much myself. But i`m happy i did, course the lady who received it was overwhelmed by it. And i`m sooooo so happy she liked it.

Hope you like it as well. Thanks for stopping by. I really appreciate it.

Some of you might notice that i have changed settings on my blog. I have removed the Google + connection to make it easier to comment. I have noticed that i allmost never got any comments on my posts and here the other day a lady told me that i should remove Google + as not many were using it. That`s why my comment section has been rather slim. I was not completely aware of the fact but now i have changed it, so i hope i get more comments now. I`m a bit slow you see, hahaha.


Tuesday, May 31, 2016

ArJo`s Tag & ATC kos

Hi there everyone!

I`m joining in a little challenge on Facebook by ArJo`s Tag & ATC kos
This month Marianne Johansson is the guest designer and she has set the theme this time. Theme set is M - for Maling or in english, P for Paint. 

We have to have a painted background and somekind of stamping and/or stenciling. All with paint.

Here is my take on the challenge.


I started off by painting the whole tag with white gesso. Next i started dabbing spots with Distress Paint (Milled lavender and Weathered wood) sprayed with water to make it run easier. Then i just held it different angles to get the paint blended. Then dried it with my heat gun. I then dabbed some extra spots here and there and dried it.


I then used Art Alchemy Opal Magic and Metallique Acrylic paint together with some stencils to create patterns. Stencils i used are Mini Harlequin, Mini Viva la art and Mini Complicated hearts. All by The Crafters Workshop. I also stamped a honeycomb pattern using black gesso. 


I also used some shimmerz spritz (Plum pudding) to get some pink spots. I also used the top of the bottle to dip into the spritz to make circles. Finally i splatted some paint here and there. Here i have used White gesso plain, white gesso blended with Plum pudding spritz and Weathered wood distress paint. 


I used my Dymo to make the text strips. To make it darker and more dramatic i used black gellato and rubbed it around the text and the edges. Around the ART text i used a gel pen course i didn`t want to muck it up too much.


To finish off my tag i coloured up some seambinding to match my tag. For this i used Plum pudding spritz for the pink one and Luminarte H2O Key Lime paint for the green one. I then added some bling and the metal medal from Tim Holtz.

If there is anything you would like to know about the creative prosess, don`t hesitate to ask. I will help as best as i can.

Thanks for visiting me today.


Sunday, December 2, 2012

Challenge #122 at Kenny K`s Krafty Krew

Good morning everyone!

It`s allmost that time of the year again...Stress, presents, food and enjoying family life. You know what i`m talking about! Christmas!!! It`s such a wonderful time of the year. The only thing i miss, is my family up north. 

I`m beginning to stress out a bit. With all that has been going on this past months i haven`t had a chance to find time to do my usual Christmas-shopping. NOT A SINGLE GIFT is in da house yet...buhu. Well, hopefully i will find some time real soon, lol.

Anyway...today we are ready with a new challenge over at Kenny K`s Krafty Krew. But we have to have some sponsors first as usual.

Firstly we have our own fabby bosses Kenny and Elena from Kenny K Downloads.

  With the prize of 5 digis of the winner`s choice.

Our second sponsor is Loves Rubber Stamps
 
 
So let`s get down to buisness. The theme set for our challenge this time is:

FROSTY HUES!
(Christmas creations in cold colours)

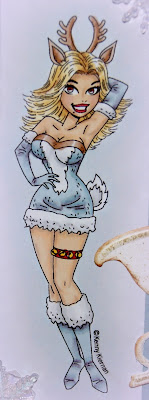
For my card i have used the image called On Vixen. She is available here at Kenny K Downloads. The papers are from Bearly Mine Designs. I have also used several Marianne Dies and also the Tim Holtz snowflake border die. Don`t remember the exact name, lol.


The colours i have used are:

Skin: Vanilla, Saffron, Oatmeal, Tan, Sunkissed pink
Hair: Cocoa, Mustard, Buttercup
Outfit: Slate, Denim blue, Pastel blue, Twilight sky
Other colours: Sunflower, Berry red, Tan, Cocoa, Cool grey #1 and 2 

Challenges entered:

Digi Galore - Anything goes
One stitch at a time - Anything goes
The ribbon girl - Christmas projects

Thanks for visiting me. I allways appreciate your sweet comments. Please come and join us over at Kenny K`s Krafty Krew. The team has some real stunners for you to look at.

Happy Crafting.

Wednesday, November 14, 2012

Challenge #110 at Crafts and Me

Good morning everyone!

I`m in a hurry today, so i have to do this post very quick. I`m off to take the drivers licence for the bus and i`m quite nervous! 

It was my turn to set the challenge over at Crafts and Me, and i`ve chosen

UNTRADITIONAL CHRISTMAS COLOURS

For my card this time i have used an image called Translucence which is from the latest release from Crafts and Me. This image is available here. It is a Sara Burrier design and i think this really looks divine. Perfect for a Chrismas card.


The medallion i`ve created myself. (not the metal part, lol) I cut out a tiny image from a sheet of cutouts from Pion Design and glued onto the medallion. Then i used an epoxy sticker to secure the image inside.  I think the end result looks great. Hope you like it too.


Challenges entered:

Lady Anne`s Challenges - Anything goes
Divas by design - Anything goes
Freshly Brewed - Dots
Penny`s Paper Crafty Challenge blog - Anything goes
Ruby`s Rainbow - Birds
Papelitos Challenges - Anything goes
 Through the craftroom door - Anything goes
Tuesday Alchemy - Anything goes


Well that`s it for today from me. Now i`m soon off to try and get the licence. Please cross your fingers for me, lol. Also please come and join us over at Crafts and Me challenges. We would looove to see your Christmas creations.

Happy crafting everyone!


Related Posts with Thumbnails